

Herbarium Hub
How to make your own herbarium
Plants are vital for all life on Earth. We eat them, build with them, produce medicines from them, wear clothes made from them and breathe the oxygen they create. Understanding the ecology and biology of our Lincolnshire flora is essential for a resilient natural environment. By collecting preserved plant specimens as a herbarium, we can gather irreplaceable information about plants and the world they inhabit.
Herbaria can be used in science to help determine the classification of new species as well as how plants interact with other organisms and to research the effects of climate change on the natural world. By preserving plant specimens in this way, we can safeguard them for future science, and create a snapshot in time of the flora growing in this changing climate.
Whilst written species records are useful, a physical specimen allows us to understand the world that the plant was living in at the time of collection. DNA material for example can help us to understand population genetics; information that may help conservation managers with the recovery of threatened habitats within Lincolnshire in the future.
Every plant specimen that goes into our herbarium has followed the same method of preparation, from collection to mounting, to ensure it remains intact for years to come. Although you don't have to collect your specimens in this way, we'll share with you our techniques honed from the Natural History Museum in London, so you can make your own herbarium collection which is set to last for generations.

Vaughn Matthews
Collection
Collecting your specimen
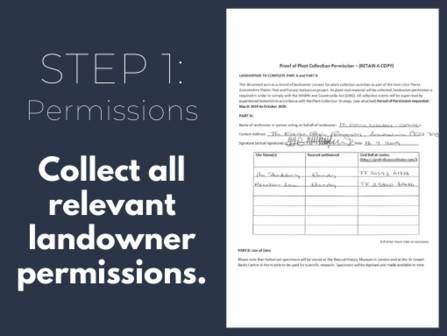
It is important before you begin collecting plant specimens to always get landowners permission. Under Plantlife's guidance, we advise following the 'one-in-twenty' rule - for every one you pick, there should be at least 20 present. Also, avoid picking any vulnerable or highly threatened 'Schedule 8' species. A full list of species on the Schedule 8 list can be found here.
In Britain, all wild plants (including wildflowers, mosses, algae, fungi etc.) are protected under the Wildlife and Countryside Act of 1981. If you are collecting on a designated site (SSSI) you must also seek permission from the Statutory Nature Conservation Organisation, i.e. Natural England.
To keep things simple, you may wish to just collect from your school/college or university grounds.
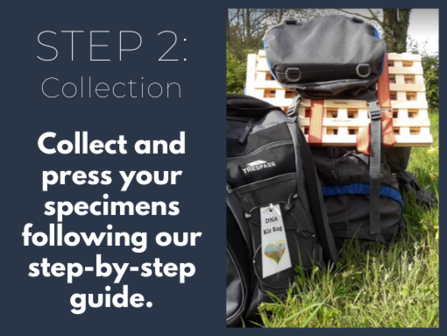
You will need
- A trowl
- Secateurs
- A plastic bag
- Notepad and pencil
- Camera
- GPS finder (smartphone)
- An ID guide - we recommend the Collins Wildflower Guide
Method
- Identify the specimen you'd like to collect, and check its ID using a wildflower ID guide.
- Try to choose a specimen that shows all the features of that plant - roots, leaves, flowers and fruits (if applicable), and that is healthy and of a typical size for that species.
- Take a photo of that specimen in situ, and make a note of it's GPS location.
- Once you've selected your specimen, using the trowl, dig down and around the base of the plant. You're looking to collect some root as well. Once you've dug out your plant, remove some of the excess soil.
- On your notepad, make a note of the plant species, your name, date of collection, GPS location and the habitat type. You can also make a note of the colour of the plant using the RHS Colour Chart.
- If the weather is fine, collect and press in a plant press immediately (see the Pressing step below). Alternatively, place the specimen in a plastic bag ready to take back and press. If you're collecting more than one species at a time, keep them in separate bags and number them to correspond with the notes on your notepad. Try not to keep it in the bag for too long to avoid wilting, and collect your plant on a dry day if possible.
If you want to create a searchable catalogue for your specimens it is important that you give each specimen a unique collection number, i.e. 01-001 (01 = Collector ID, 001 = first specimen in the collection for this collector). Any species, location and habitat information is therefore linked to this unique number.

Neil Aldridge
Pressing
Pressing your specimen
Don't worry if you don't have a plant press. Layers of newspaper and lots of heavy books will do the trick. If you do have a press, use layers of corrugated cardboard and blotting paper between samples to help draw out the moisture.
You will need
- Sheets of newspaper
- Corrugated cardboard (if you have a press)
- Blotting paper
- Books or heavy objects
Method
- Lay out your specimen on a piece of opened newspaper inside a book that will fit the specimen inside. How you press the plant now is how it will appear when it is mounted later, so think about composition - will it all fit on the page, are all parts of the plant visible?
- Turn a couple of leaves over so both sides are showing. If there are flowers, put the flower head in a position that shows the centre of the flower as well as it's petals.
- You may need an extra pair of hands to help hold your specimen in position! Then fold over the newspaper so the plant is secured inside, and close the book. Place more books or heavy objects on top to help apply even pressure.
- If the specimen is particularly bulky, you may need a couple of extra sheets of newspaper to help draw out moisture.

Lauren Heather
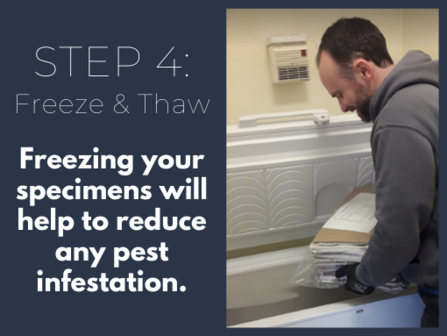
Drying, freezing & thawing
Drying, freezing and thawing your specimen
It is essential to draw out all the excess moisture from your plant specimen before attempting to mount it onto paper. Drying it will reduce the risk of specimens getting mould and will help to preserve the plant. Make sure you keep your recording notes safe while the specimens are dried and processed.
Freezing is an optional step but is essential if creating a long term scientific collection and to reduce the risk of pest damage.
You will need
- Fresh newspaper
- Cardboard box
- Sealable polythene bag
Method
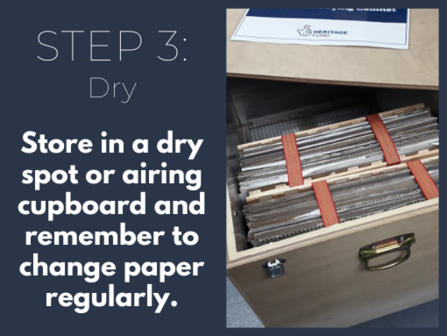
Drying
- Leave the book(s) with your specimens inside in a warm and dry place, i.e. an airing cupboard, and change the newspaper every day. Fresh newspaper is essential for absorbing moisture from the specimen. The specimen is ready when it is no longer floppy but rigid.
Freezing
- Place your specimens in a cardboard box and wrap in a sealed or tied polythene bag.
- Place inside a domestic freezer for at least two weeks.
Thawing
- After two weeks in the freezer, it is essential to thaw your specimen before mounting onto paper. Allow at least 24 hours for it to thaw after coming out of the freezer.

Neil Aldridge
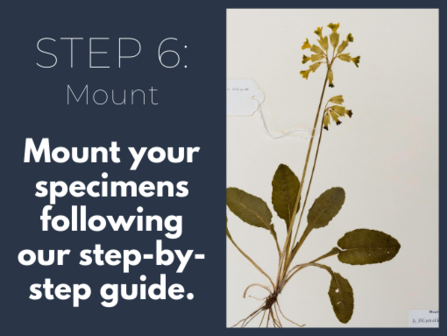
Mounting
Mounting your specimen
The LoveLincsPlants project use museum-grade, acid-free glue and acid-free paper measuring 285mm x 445mm. Good quality A3 paper, preferably acid-free, will be sufficient, but it's worth considering a larger size if you were considering donating your collection in the future.
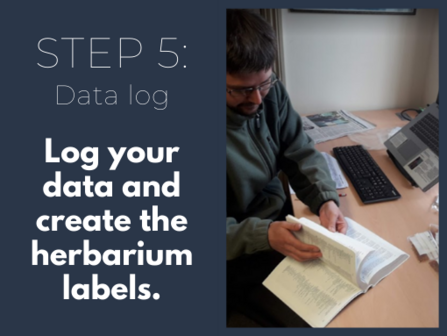
Before mounting, you may wish to store your collection data into a spreadsheet so that you can easily share and edit data in the future. You can also use your spreadsheet to print your herbarium labels using mail merge. Otherwise, a handwritten label will do just fine.
You will need
- Mounting paper
- Specimen label
- A piece of card for a capsule
- PVA glue and water mix (50/50 mix)
- Sponge
- Newspaper
- Coarse paintbrush - for removing soil
- Artist brushes - a range of sizes for applying glue
- Small spatula
- Pencil
- Scissors and/or scalpel
- Brass paperclip
- Tweezers
- Masking tape or linen strapping
- Waxed paper or greaseproof paper
- Beanbags or other weights
Set up
- Remove any excess soil from the specimen using a coarse grade brush or spatula into the waste bag when still on it's original newspaper.
- Decide where to position your specimen before mounting. This is called 'laying out'. Flip over specimens to find the best side that displays flower(s) and both sides of leaves. Don’t bend them over if they are too rigid as they may snap off. Position your herbarium data label in the bottom right corner of the page leaving a 1cm margin from the edge.
- If there is room on your sheet, you may wish to snip off a flower and a leaf (if sufficient numbers) and add it to a small card or paper envelope for future analysis. This capsule can later be glued to the herbarium sheet next to your data label.
- Make sure the flowers/fruits are clearly displayed. If you haven't already, fold a couple of leaves over so you have an example of the front and back showing. Try and fit the whole specimen in the centre of the paper whilst keeping a 1cm margin around the sheet.
- Expose hidden flowers/fruit by removing excess leaves. Cut cleanly with a scalpel or scissors and place in a capsule envelope together with any loose items. Add samples of flowers and fruits to the capsule if available. Do not strip the plant of these features.
- For every specimen you mount, use a fresh sheet of newspaper to work from to avoid contamination and to keep your mounting paper clean.
Gluing & strapping
- Glue/strap the specimen first. Apply a light layer of PVA glue and water mix to the back of your specimen by gently patting with a brush or sponge. Position your specimen and press down gently. Use pebbles or beanbags to help with anchoring your specimen.
- Use a small spatula on finer specimens to apply glue from behind, then gently press or dab down with a sponge.
- For large seed heads such as thistles, spot glue with a palette knife as these are prone to breaking.
- Dab off any exposed glue on the sheet with a moist sponge.
- Using masking tape or linen strapping if you have it, cut thin strips and apply to areas which may come loose (roots, large stems or below flower heads) using a small spatula. This will keep your specimen extra secure. Try not to obscure leaf joints with the stem or flower/fruit parts.
To make sure the specimen is attached firmly, place a piece of waxed paper over your mounted specimen, then weight down with beanbags or a heavy object, distribute evenly and leave to dry for 5-10 minutes. Flip the sheet over to check if attached securely and spot glue and areas that are still loose.
Plant label
- Cut out a label that will fit neatly in the bottom right corner of your herbarium sheet.
- Using a pencil, write down the specimen name, date, collectors name and the location details from where the plant was collected.
- With the PVA glue mix, add the mounting label to the specimen sheet in the bottom right-hand corner, leaving a 1cm gap from the edges.
Capsule
- Your capsule should contain a sample of the flower/fruit if sufficient material is available and any leaf material. Any broken leaf material can be placed in here.
- Attach a brass paperclip (to avoid rusting) to the bottom to secure the capsule, then using the PVA glue mix attach it to the left of the herbarium label, or the center bottom if it does not fit.


Mark Hamblin/2020VISION
Storage
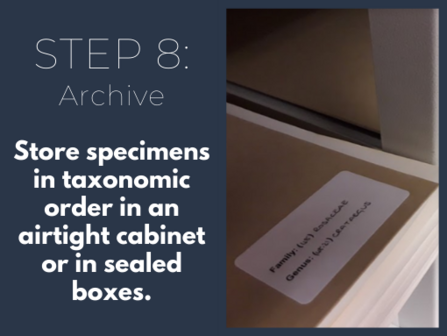
Storing your specimen
After mounting you specimen, it's important to correctly store it so it's not damaged by environmental factors such as damp, sunlight or even insects. For the LoveLincsPlants project, half of the herbarium collection is stored at the Natural History Museum and the other at Sir Joseph Banks Centre in Horncastle. Here's what you need to make sure your collection lasts for years to come:
You will need
- Paper species folders
- Card genus folders
- Cardboard boxes
Method
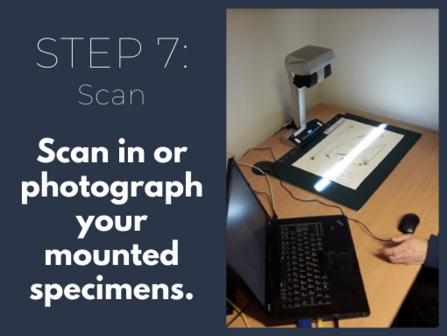
You may wish to scan or photograph your collection for creating an online resource or just to share images with others. A mounted camera or flat bed scanner will work well.
- Place the mounted specimen inside a paper folder which can be labelled with the specimen name for reference. The LoveLincsPlants project uses museum grade, acid-free paper folders measuring 287mm x 449mm, but a piece of good quality A3 paper folded in half would also do the trick.
- You could organise your specimens in taxonomic order i.e. placing labelled species folders into genus folders to make searching through your collection easier. The genus folders should be made with more rigid card.
- Store your labelled folders in a cardboard ‘family box’, i.e. the Daisy family. Alternatively, folders can be placed in family order in metal cabinets with horizontal shelves.
- Mounted specimens should be stored at around 22°C, in a room free of pests, preferably inside a lockable cabinet and away from direct sunlight.
-
Aim to inspect the collection every six months for signs of insect damage. If there is evidence of live insects or remains, wrap up the boxes and freeze following the same direction as before.

Ross Hoddinott/2020VISION
Further information
Materials and further information:
- Making a plant press (https://www.anbg.gov.au/cpbr/herbarium/collecting/collection-procedures.html)
- Example herbarium box (https://www.preservationequipment.com/Catalogue/Archival-Storage/Boxes/Drop-Front-Herbarium-Box-17-x-12-14-x-5-P999-735-1715)
- The Herbarium Handbook (https://www.nhbs.com/the-herbarium-handbook-book)
Professional quality herbarium materials and equipment:
Video guide: How to make a herbarium
A film produced by Jack Perks Photography giving a round-up on the processes to make your own herbarium.
Video guide: How to mount plant specimens for herbaria
Filmed by Kath Castillo at the Natural History Museum, this video gives a step-by-step process on how to mount your plant specimens.
Inside the Natural History Museum
A virtual tour of the herbariums at the Natural History Museum in London, with Dr Fred Rumsey, Senior Curator at the NHM.
NHM herbarium tour (https://www.youtube.com/watch?v=8iCuDr3OubI)
NHM herbarium tour presented as part of BSBI's 2020 Exhibition Meeting (https://aem.bsbi.org/)